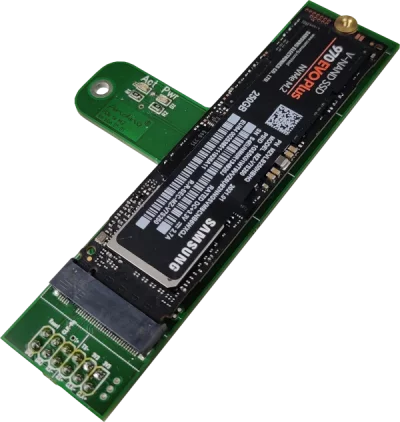
Andino PCIe to M.2 Adapter
The PCIe to M.2 adapter can be used in conjunction with the Andino CM4 IO board to connect an NVMe SSD to the Raspberry Pi Compute Module 4. This allows for better performance, longevity and larger capacities than the eMMC memory of the Compute Module offers and is especially beneficial for applications such as databases, web servers and other applications with high performance requirements. The adapter is connected to the CM4 IO board via its PCIe X1 pins. It comes with a Samsung 970EVOPlus NVMe SSD pre-installed and can be ordered directly with the Andino CM4 board (Without Wifi | With Wifi).


Setup documentation
Important note: The Andino PCIe to M.2 adapter is only officially supported for use with the Andino CM4 IO board. Furthermore, it does not necessarily support all types of SSDs due to power draw limitations. This documentation thus only details its use with the included SSD.
Hardware installation
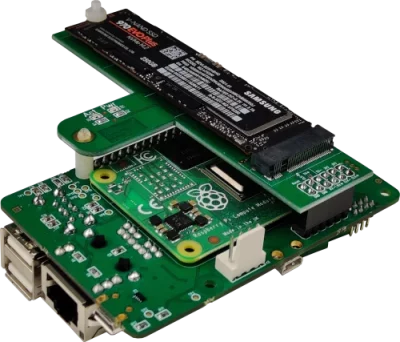
If you bought the SSD as part of an Andino board (Andino X1, Andino Gateway, Andino XIO, ...) you can skip directly to the software installation. If you bought the adapter separately, plug it into the adapter as shown in the picture below:

After having installed the adapter, the CM4 board can be powered on by providing power to the GPIO pins 2 (5V) and 6 (GND) or by plugging the IO board directly into one of our Andino boards. (see here for a full documentation on the GPIO pins).
Software installation
As a prerequisite, it is assumed that you have already flashed Raspberry Pi OS to the Compute module and followed the further steps explained in our Compute Module 4 Installation & Setup guide.
First, log in via SSH. When running lsblk you should see the SSD (in this case as nvme0n1):
NAME         MAJ:MIN RM   SIZE RO TYPE MOUNTPOINT
mmcblk0      179:0    0  29.1G  0 disk
|-mmcblk0p1  179:1    0   256M  0 part /boot
`-mmcblk0p2  179:2    0  28.9G  0 part /
mmcblk0boot0 179:32   0     4M  1 disk
mmcblk0boot1 179:64   0     4M  1 disk
nvme0n1      259:0    0 232.9G  0 disk
If you are using a new SSD, we may need to create a partition and usable file system. Note that this will delete any pre-existing data on the drive. To do so, run sudo fdisk /dev/nvme0n1. Within this utility, do the following:
- Press
dto delete any already existing partition. If no partition is already defined, fdisk will tell you so and you can proceed with step 2. If multiple partitions are defined, delete all of them by repeating this step multiple times. - Create a new partition by pressing
n. Then presspto create a primary partition. Choose the default values in all following steps by simply hitting enter. - Afterwards hit
wto write the new partition table to the disk and quit fdisk.
Now we still need to create a file system for our drive. To do this, simply execute the following command:
sudo mkfs.ext4 /dev/nvme0n1Confirm that you really want to create a file system despite the existence of a dos partition table with with y. Finally, create a new directory as a mountpoint for the SSD...
sudo mkdir /mnt/nvme0n1...and mount the drive into that directory:
sudo mount /dev/nvme0n1 /mnt/nvme0n1The SSD is now available under /mnt/nvme0n1 and is ready for use.